Christmas Day is 19 days from today.
This year, things are different. My "have" and "have not" columns are flip-flopped. In years past, I have had (some) disposable income, but I was working so much that I didn't have time to even think about gifts on more than a material level, much less go out and acquire them.
So most of my shopping was done online, depending on Fed-X and UPS to deliver. I usually have money, but no time.
This year, my disposable income level has significantly diminished but I have time. That actually makes me happy.
I have also been able to slow down enough to listen to people around me about what is becoming more important in a more cultural way due to the tough economy. Lately, that voice has been telling me that I need to pay more attention to my closer neighbors; to help the economy by buying things that are produced and manufactured locally and sustainably; to respect the earth and people, and animals.
This makes sense, because in my heart I have always wanted to be steward of the land, and a good neighbor, but in practice I have fallen short--'way short.
To that end, I have finally come to a place in my life where I can start practicing some of what I know is the right way to live, and by doing so I will help others (by buying local), be a better steward of the land (by making sure that I buy organic, seasonal, sustainable practice goods as much as possible), and help my family and friends by gifting things that are less materialistic and more appreciated (I hope) than the next, latest electronic gadget.
I also have been preaching to my own family about organic, sustainable, local, seasonal, blah, blah, blah. We have discussions about it whenever we get together. My family agrees with me that those practices are admirable, and ideally they would like to adopt these philosophies, but there are downsides, of course. The biggest roadblocks my family has to this (and I am sure they are not the only ones), are the following:
1. Locally grown (and especially organic) products are from small farmers in our area, and they cost more than the grocery stores. My family knows the reason, but at the end of the day cost is cost.
2. Sourcing the locally-grown products is more time and/or labor intensive for the consumer, and face it, if we are going to have any money with which to eat, we generally don't have time to go track it down.
3. It is more difficult to find a variety of fresh foods/vegetables all year long, and most of us don't have the time, let alone know how to preserve foods by canning/freezing, drying, etc.
So here is my Christmas gift to my family (there are 3 household represented in total, besides mine)
I will deliver a certain dollar amount of organic, local, sustainable-practice, seasonable groceries to their homes each month. I will include recipes that I have tried myself that will vary each month according to the product selection and personal tastes (I will also try to pick products that they will like and use). This way, we will be sure to spend some family time together each month throughout the year, they will have a useful gift that is replenished throughout the year, they don't have to take the time to source all the different aspects of the products, they get to support the local farmers and sustainable practices, and they (and I) get to support the "Buy American" movement that is the "call to arms" this holiday season.
Some of the products I can include seasonally will be:
*Seasonal vegetables of all kinds grown locally from our farmers markets and private gardens (from the barter system)
*Local honey
*Goat's milk products like milk, cheese, skin products, etc.
*Humanely raised, sustainable practice, free range, hormone and antibiotic-free, pasture finished (in some cases, organic) proteins such as beef, lamb, goat, wild and domestic pork, venison, fish and seafood, poultry, and eggs
*Seasonal Organic Fruits, (especially local citrus here and when I go to Alabama, all kinds of fruits and berries, both wild and from our local markets up there--hey, that counts as local if I live there part of the time!)
*I am sure that this list will grow as I spend the time developing a list of dependable sources of products that appeal to me and my family.
I think the only limitations will be how much I can afford, and how much time I can devote to sourcing things, but that is also dependent on how resourceful I am!
My family is a pretty adventurous bunch of eaters, like me, so I can source cuts of meats that a lot of people would leave at the processor's, odd vegetables that farmers may not be able to sell as easily in the farmer's markets, etc. I am lucky in that way.
I know that this won't work (or be appreciated) by every family in America, but my I know my family will like this type of gift. Will it work for yours?
The slogan this season is "Buy American--Are You In?"
I am in.
Tuesday, December 6, 2011
Friday, November 18, 2011
Rustic Spanish Chicken Thighs, Fresh Spinach, and Cauliflower Puree

A finca is a small farm, and in 1960's Spain, they were self-sustaining. The farmers raised (or gathered) all their own food, so the barnyard contained small livestock such as rabbits, goats, and chickens for the proteins which they used in their meals.
I was an adventurous child, often wandering for up to a mile into the woods, which is how I thought I found this "hidden" place that was all my own. Mind you, in my universe (I was six years old) I was the ultimate adventurer, exploring far and wide through the woods and discovered this random little farm with its friendly (to me) guard dogs, and incredibly warm and welcoming owners completely on my own.
It was my discovery, these were my people.
The reality was that my mother had actually scoped out the area using the (completely mundane, in my opinion) dirt road that led from the highway past our house to the farm, and had met the neighbors, relating to them my precociousness in advance of my arrival. Hmph. I didn't know they had been warned. At least the woods were mine.
Lucky for me, they loved kids. All Spaniards love kids. And so, they invited me into their home and taught me the ways of the farm.
We fed the barnyard animals, we collected the eggs, we weeded the garden and picked the vegetables that we would use for lunch and to sell in town, and we hunted wild mushrooms, asparagus and snails in the woods beyond the farm walls. This is one of my very favorite memories of Spain; I was part of this family, sharing in the work and the life of this little farm. No experience was held back because of my age or gender.
I was allowed to participate in the production process of the farm, from maintaining the garden and picking the vegetables, hunting and gathering wild mushrooms, asparagus, and snails (yes, the French claim the corner-market on Escargot, but the Spanish Snails are 'way better than any of the fru-fru French snail dishes I have tried). I helped feeding, raising, and butchering the animals that we ate. I learned to chop off a chicken's head rather than wringing its neck, so that it doesn't suffer as much, dip it in boiling water so the pin feathers pluck out easier.
I learned to humanely kill the rabbits and goats, and how to clean, skin and butcher them, preserving and using the pelts of each, and making sure that every edible part of the animal was utilized, including organs and bones. I learned that every part of the animal is really tasty if it is prepared and cooked properly. Honestly, I can't remember anything that they served me that I didn't like!
Most dishes are served very simply, without over cooking, over spicing (although smart spicing is incredibly important!), heavy sauces, etc.
And this brings me back to this century, and the chicken thighs, fresh spinach, cremini mushrooms, and cauliflower which were on my counter awaiting preparation.
I kind of miss the fact that I didn't have to butcher the chicken, pick the spinach and cauliflower, and hunt the mushrooms myself, but oh well.....here are the recipes that I developed to honor my time in Spain:
For the cauliflower puree:
- one large head of cauliflower, cut into large pieces
- 7-9 whole Cremini Mushrooms, (also known as Baby 'Bellas), cut into quarters
- drizzle of Goya brand Extra Virgin Olive Oil
- 1 head of Garlic, cut in half lengthwise
- sprinkle of sea salt, cracked black pepper to taste
- heavy cream
- 1 tbsp. unsalted Butter (I love Kerrygold brand-it is Irish, not Spanish, but my people made their own butter, and there is no brand that I know of sold here in the states from Spain)
- 1 teaspoon of fresh Rosemary, finely chopped and divided in half
Spread the cauliflower, mushrooms, 1/2 tsp. of the Rosemary and Garlic (cut side up) on a cookie sheet
Drizzle with olive oil
Roast in the oven for about 30 minutes, stirring about every 10 minutes to roast evenly
Sprinkle a bit of salt and pepper on about halfway through cooking time
(I start the chicken when the veggies are halfway done roasting, so everything finishes at the same time)
When done, remove from oven, transfer cauliflower to a food processor and pulse on the Puree settingChop the Mushrooms into smaller pieces (how small is up to your taste)
Add the cream, a bit at a time, while pureeing, to get a whipped potato consistency
Add the butter and the rest of the Rosemary
Add more salt and pepper if necessary (taste first!)
Fold in the Mushrooms and plate this first for the best presentation
For the chicken (cook this before the spinach so you can use the drippings to flavor the spinach):
- 4 chicken thighs, skin on and bone in (makes for more juicy and flavorful chicken)
- mix up a dry rub of 1 tsp. ground cumin, 1 tsp. smoked paprika (Goya makes a smoked paprika you can find in most Publix Supermarkets), 1 tsp. sea salt, 1/2 tsp. cracked black pepper, and finely chopped rosemary and thyme
- 1/4 cup of extra virgin olive oil (I use spanish Goya brand, because it is the most fragrant/flavorful)
Heat the oil in a large (cast iron if you have it, since the Spanish farmers cook most often in cast iron) on medium-high
Rub a small amount of oil on the chicken (like you are putting Coppertone suntan oil on yourself; not too much)
Rub the chicken all over with the dry rub and let sit for about 5-10 minutes
Add the chicken, skin-side down, to the pre-heated oil (be careful of splatter)
Cook chicken until skin is dark golden brown, turn over and cook the other side until it is the same color and the internal temperature is about 165*F. If the skin browns too quickly, transfer it to a baking dish, and finish the cooking in the oven with the veggies at 400*F until the temperature is right. There may be a bit of pink at the bone, but if the chicken is 165*, is free-range organic (or from your local sustainable farmer), you don't have to worry. Just make sure the juice is clear.
Allow the chicken to rest while you finish and plate the Caulifower and Spinach.
For the Spinach:
- Approximately 10 ounces of fresh spinach leaves
- 1 tsp. of the leftover oil and drippings from the sautee pan (pour off the excess)
- salt, garlic, and pepper to taste
- 1 pat of unsalted Kerrygold Butter
- 1/4 fresh lemon, juice and zest
Add the garlic if the pan isn't too hot (careful not to burn it), and add the spinach leaves.
On medium-high, cook the spinach leaves, stirring/turning constantly until they are completely wilted and dark green
Add a small amount of salt and pepper (there will be some residual seasoning left from the chicken)
Add the butter and stir in
Add the lemon juice and zest, give a quick stir, and plate over the Cauliflower Puree for the best presentation, and add the chicken on top
Serve with Crusty Sourdough Bread (alas, the authentic Spanish bread called Pan--pronounced, "pahn"--doesn't exist here in the USA)
Enjoy, and think of Spain!
Monday, September 19, 2011
Mary's cooking
Wow Mary! You are definitely more adventuresome than I am when it comes to cooking. I will try new things and do some experimenting, but I guess I am just too picky. I think that comes from being forced to eat some things as a child even after I said I didn't like it. Oh well, we each have our own tastes, likes, dislikes, etc. That's what makes us who we are.
I do enjoy seeing your pictures and reading your recipes on here. It makes my brain start working. lol
Thank you for bringing the more... adventurous level to our food blog!
I do enjoy seeing your pictures and reading your recipes on here. It makes my brain start working. lol
Thank you for bringing the more... adventurous level to our food blog!
Friday, September 9, 2011
Red Wine Poached Stuffed Figs
Red Wine Poached Stuffed Figs

I was shopping in Publix the other day, and saw my hairstylist, Ernie Heinrich, who had an armful of groceries (he is just like me in that we always go in thinking that we will just pick up a few things and who needs a cart for that?). Among his armload of goodies, he had two containers of fresh figs; he asked me if I liked figs. I replied that I did, and told me that they were on sale--buy one get one free.
What I declined to tell him is that I have never cooked (with) fresh figs in my life, but the ones he had in his arms looked very good. So I was seduced by the BOGO.
I didn't use them for a few days, because I truly didn't know what to do with them, but tonight, I got to thinking about the taste of figs, and wondering how I might incorporate them into dinner.
Sometimes my brain decides to be adventurous, so I as I looked at the figs in the package I let my mind remember the taste of figs, and mentally built a meal around some flavors that I thought might complement the figs.
The skin of the figs looks kind of like pears, and when I handled them, they seemed to have a similar texture and structure, so I thought they might do well in some kind of poaching liquid, and then my mind floated to red wine. Mmmmm......
I had the last 1/2 pound of bulk pork country sausage that I got from my farmer in north Georgia in the refrigerator, and then I looked in the pantry and saw some prepared artichoke bruschetta. I thought it might need a bit more bite, and when I looked in the refrigerator again, the crumbled goat cheese spoke to me. The last ingredient that I selected was some celery, which I minced to give it a bit of crunch.
I browned the sausage in a saute pan (I have a great anodized 12" saute pan with 3" rounded sides that are just right for doing that fancy flip to turn ingredients that the TV chefs do!--I use it for almost everything!). As the sausage was browning, I scooped the insides of 8 golf ball sized figs out, and when the sausage was cooked, I poured off all but about 1 tbsp. of the sausage grease, and added the fig insides and about 3 tbsp. of the bruschetta, and about 2 oz. of the goat cheese. I warmed this mixture in the saute pan, added the celery at the last minute so it wouldn't get soft, and then spooned the mixture into the scooped out figs.
Then I washed the pan out and sauteed the fresh asparagus tips in some olive oil, butter and garlic, and plated them over some saffroned rice.
Then, I placed the stuffed figs in the same sautee pan and poured about 1/4 bottle of Mad Housewife Cabernet Sauvignon in the pan, and let the figs poach, covered, on the stovetop for about 15 minutes (this doesn't have to be exact--the figs are actually forgiving of extra time on the heat).
I took the figs out of the pan with tongs, placed them on the plate, sprinkled with some more goat cheese, and spooned some of the wine over top of the figs.
I told my husband that we were either going to have a successful grand experiment, or scrambled eggs if it didn't taste good.
We will have scrambled eggs tomorrow night. Tonight, the stuffed figs were a home run! It is actually very easy to prep, and takes only a short time to pull together and cook. Oh, I also served some crusty sourdough french bread with it.
Sunday, September 4, 2011
My "I Think Eddie Would Approve" Chicken Rollatini
We have a local Italian Restaurant that has been in the same location, and owned by the same Italian family for more than 20 years. Giusseppe's in Fellsmere, FL is my favorite Italian restaurant and I feel like I am being disloyal when I eat at another Italian restaurant, so I don't. Now, this is tradition at its best--the father, Giusseppe, opened this restaurant in the early 1980's, and when he retired, his son (who was a very good chef in his own right in the Washington DC area), moved to Indian River County with his entire family, and took over the business. As much as I loved Giusseppe's cooking, Eddie's is even better! One of my hubby's favorite dishes there is the Chicken Rollatini, and I got inspired the other day to try to replicate it myself. I think it turned out rather well, and hubby gives it his stamp of approval. There is only one drawback to this, and it is a big one...if I can make rollatini that Gary likes as well as Eddie's, what is the incentive to EVER go out to eat? (Did I goof up royally??)
Chicken Rollatini (or Roulade)

Special Materials:
Butcher string
Meat pounder
Large sauté pan w/min. 3” sides for pan frying
Oven dish
Ingredients:
1 lb. chicken breast, butterflied
4-6 slices whole milk Mozzarella Cheese (slices
are easiest, but of course, good quality fresh
mozzarella is best)
4-6 slices of Prosciutto
Fresh Tarragon leaves, chopped to approximately 4
tablespoons (or a pinch of dried for each breast)
Garlic Powder
Salt and Pepper
For the breading:
Salt and Pepper
Garlic Powder
All Purpose Flour
1-2 Eggs (I use duck eggs, because there is more
yolk ratio for richness and you only need one, but
use 2 chicken eggs)
Panko Bread Crumbs
For the Gravy:
4 Tablespoons Butter
2 Tablespoons All Purpose Flour
Fresh Garlic (or powdered)
1 cup Chicken stock
1 cup White Wine
1 squeeze of fresh lemon juice
4 oz. Crimini Mushrooms, sliced
Preparation: *note—The chicken breasts can be prepped ahead
of time and refrigerated before breading because it is a bit labor-intensive to
do all these steps at once.
Butterfly each half of the chicken breast, and
then cut that in half, so that you have four pieces.
Pound out each piece of chicken until it is
uniformly thin, but be careful that you don’t make holes.
Lay one layer of prosciutto and then one layer of
mozzarella on each breast, and then roll up as tightly as possible. Tie up with butcher string. (you may cover
each piece in Saran wrap and put in the refrigerator at this point).
Preheat the cooking oil to about 280-300
degrees. You don’t have to get the oil
blazing hot, because we will be finishing off the chicken in the oven, and with
chicken, the risk is burning the outside without cooking fully through. Remember, the middle of the Rollatini should
be 160-165F degrees when it comes out of the oven, but it can be around 150F
coming out of the oil.
Make your breading station with three pans; one AP
Flour pan, one egg wash pan, and one Panko breadcrumb pan.
Dip each breast in AP flour then egg wash, then
press and roll in the Panko to get them to stick well. Let them rest on a plate for a minute or two
(this makes the Panko stick better while in the fry oil).
Preheat the oven to 400F degrees.
Place them in the oil and cook until light golden
brown on all sides. Don’t let the Panko
get dark, because it will brown further in the oven. Take the rollatini out of the oil and blot
them lightly on a paper towel, then transfer them to the oven dish.
For the gravy:
Pour off the oil out of the sauté pan, but reserve
the golden bits in the bottom of the pan.
Let the pan cool to warm, then add 2 Tablespoons of butter, and the
fresh garlic, and let the garlic cook on medium-low heat until almost
translucent and very aromatic, then turn up the heat to medium high and
immediately add the mushrooms in one layer so they sear well.
When the mushrooms are seared, turn the heat back
down to medium, add the rest of the butter, and 2 Tablespoons of all purpose
flour and stir until bubbly and golden.
Add the white wine and chicken stock and cook for a few minutes,
stirring constantly until the sauce thickens.
Add a squeeze of lemon juice and salt and pepper
to taste. Cook down until it thickens
to the right consistency. If it gets too
thick, add more white wine (or chicken stock, but my preference is the wine).
Sautee the spinach (if your timing is perfect, you
can use the same pan as the gravy as soon as it is finished), and plate that
first as a bed for the Rollatini.
When the internal temperature of the chicken reaches
160-165F, remove from the oven, plate over the sautéed spinach, and spoon ¼ of
the gravy and mushrooms over each plate.
Sprinkle with some fresh basil or parsley and
serve with Crusty Italian Bread.
Thursday, September 1, 2011
Braised Lamb Shanks
BRAISED LAMB SHANKS

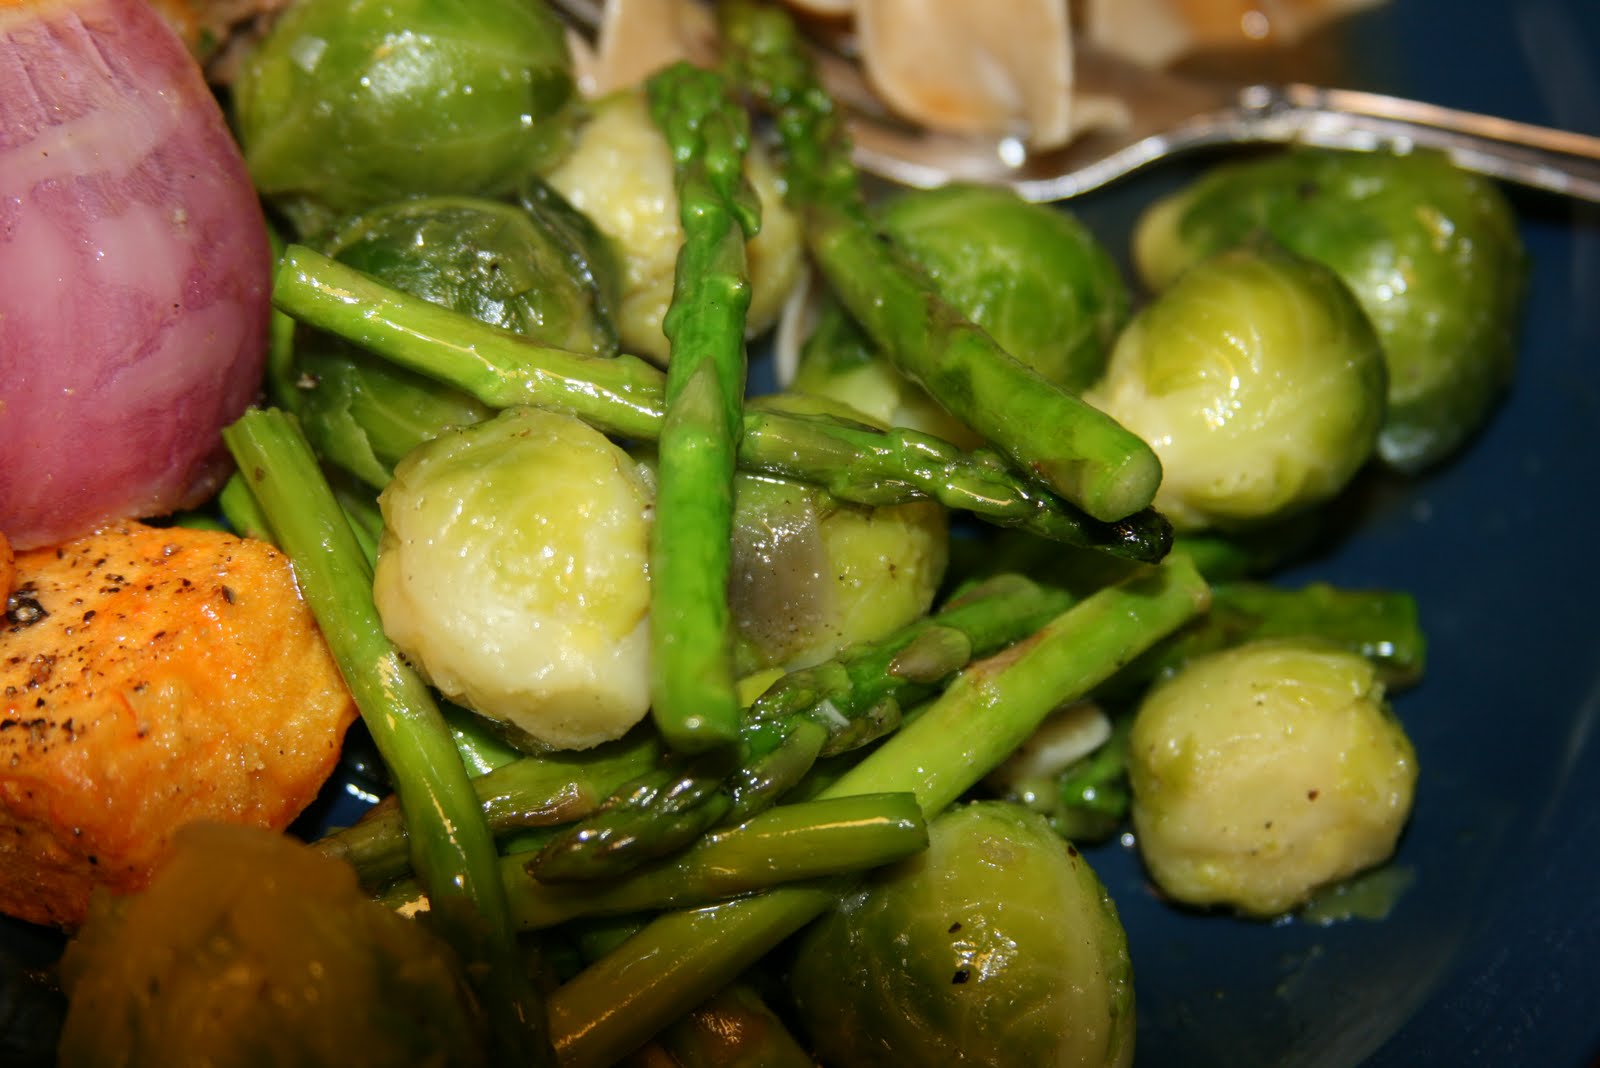
This picture didn't turn out exactly as elegant as I had wished, but the dish turned out exactly as I had hoped. There is nothing more succulent than the deep flavored, fall-off-the-bone lamb shanks. This is also a "man's meal". If you have a carnivore in your household, make this dish and he will slave away all day in the yard, building fences, creating stalls for your horses, planting gardens--whatever you wish.
Here, I fixed it with Saffroned Short Grain Rice and a medley of Crookneck Summer Squash and Crimini Mushrooms, which I sauteed in a bit of olive oil and butter.
Ingredients:
1 lamb shank per person--this recipe is based on two servings, so double the veggies, etc. for four and so on (they look like something Fred Flintstone would eat, don't they?)
1 onion, chopped
2-3 medium carrots
6-8 healthy sized cloves of garlic
1 10 oz. can tomato paste
2 medium stalks of celery
1/2 bell pepper
Salt and pepper
1/4 bottle Petit Syrah Red Wine (or other semi-dry to dry red wine) (save the rest to drink with dinner!)
Vegetable Stock or Veal Stock (I prefer Vegetable to let the Lamb flavor shine)
Preparation:
Preheat the oven to 375 degrees.
In a food processor, puree the onion, carrots, celery, bell pepper, and garlic
Season the Lamb Shanks with salt and pepper
Heat about 4 tablespoons of extra virgin olive oil in a very big sturdy sautee pan or Dutch Oven to medium-high on the stovetop (the oil should shimmer but not smoke).
Sear the shanks well on all sides. Make sure they are really brown on as much of the surface as possible to develop the flavor, and also to render some flavor and bits for the next step--Remove the shanks to another dish on the counter to rest and pour off almost all the fat from the pan; reserve the lamb bits that accumulated in the pan and add a touch more EVOO to the hot pan.
Add the pureed vegetable mixture to the hot pan the lamb was in, and cook them to death on med-med high heat. Cook them for about 20 minutes at least, and when they look almost burnt, add the tomato paste and cook it about 5-10 minutes more. You should not be able to taste any rawness or individualized veggie flavor in this mixture--it should all meld together.
Add the wine and some of the stock, and while stirring, let it come to a boil, then add the shanks and snuggle them down into the mixture. Then add the rest of the stock to cover or almost cover the shanks. Cover tightly, or put the lid on the Dutch oven and transfer to the oven. Let this cook for at least 2 hours. This is the easy part, because the longer you let it cook, the better the flavor of the juices develop and the more tender the meat becomes. Just make sure that the liquid doesn't reduce down so far that the bottom burns. If the juice becomes too reduced (too thick) before you are ready to serve, simply add more stock--it is that easy! Do be sure to taste the sauce a few minutes before removing from the oven to test the seasoning, add more if necessary. This dish also goes well with roasted potatoes and probably potatoes of any kind!
Monday, August 22, 2011
Baked tilapia

BAKED TILAPIA
Tilapia is, in my opinion, an easy fish to cook. It is a light fish. It works well with baking but not as hardy for frying as catfish is. That is my personal opinion.
Preheat oven to 350.
Lightly drizzle your tilapia with a little EVOO (olive oil). Make sure both sides of the fish are evenly coated. Sprinkle it with old bay seasoning, a little bit of dill, and some salt & pepper. Go easy on the salt when using the old bay. Squeeze some lemon juice over the top of the fish and into the pan. You can also put a couple pats of butter into the pan. Sprinkle the fish with some garlic powder being careful not to use too much. You want the flavor of the fish to come out and not be overpowered with all your other seasonings.
Place in oven and bake for appox. 15 – 20 minutes depending on the thickness of your fish. Test a piece for doneness before serving.
- Garnish with some fresh parsley and some fresh cut lemon slices or wedges. Serve immediately.
~Teresa
Baked chicken with blueberry reduction

CHICKEN WITH BLUEBERRY REDUCTION SAUCE
Chicken – whatever parts your family likes best
salt
pepper
poultry seasoning
garlic powder
Reduction ingredients:
blueberries – about 2 good handfuls
pancake syrup, ¼ cup
apricot preserves, 2 tbsp.
Applesauce, ¼ cup
apple cider vinegar, 2 tbsp.
Preheat oven to 350.
Drizzle a baking dish with a little Extra virgin olive oil (about 2 tbsp.) Season your chicken and place in oven.
Blueberry reduction
In a saucepan over medium heat, place blueberries and rest of ingredients let heat through stirring occasionally. Do not let it burn. It should begin to thicken pretty quick. You can add a little water if it gets too thick.
Pull chicken out of oven and flip it over. Pour reduction sauce over all the chicken and return to oven. Leave it for remainder of cook time. (approx. 15 min.)
- Total cook time will vary depending on the amount and cut of chicken you have. The reduction sauce should take approximately 15 – 20 minutes total.
~Teresa
Saturday, August 20, 2011
Pasta party!
Here is a pasta dish I made recently. I have posted some recipes on my FB page and my good friend, Mary reminded me that I need to post them on here. Sorry to be so lax in posting lately. Enjoy!
 Penne Pasta with vegetables and spinach pesto
 Penne Pasta with vegetables and spinach pesto
whole wheat penne pasta
1 onion, chopped
bell pepper – 1 green and 1 red, chopped
cherry tomatoes
2 garlic cloves, minced
olive oil
salt & pepper
pesto
spinach, I used frozen and just gave it a quick rinse to thaw out.
pistachios - a good handful
olive oil
2 garlic cloves
parmesan cheese
basil
salt
I don't measure when I cook so my amounts here are just estimates. Play around with your measurements, using a little at a time, until you get the amounts that taste right to you.
Get a pot of water boiling and salted. Put your pasta in the water and cook for about 7 – 8 minutes. You want it to be al dente.
Meanwhile, put your pesto ingredients into a food processor and blend. Keep blending together until you get a consistency similar to a lightly loose frosting. It should have just a slight thickness to it. Once it is done, set aside.
Put your vegetables in a pan over medium heat to saute except for the cherry tomatoes. Those will go in last so they don't turn into mush. Add the cherry tomatoes when the vegetables are soft and the onions are just translucent.
By now your pasta should be done. Remove from heat, drain, and add it to the vegetable mixture. Mix it all together well. Add the pesto and mix well.
Serve hot with a nice loaf of garlic bread, or whatever bread is your family's favorite.
~Teresa
Friday, July 8, 2011
technical difficulties
For some reason I have been having problems with loading things on here. I can't upload any pictures and I also can't load some documents.
I just can't figure this one out! I have a bunch of pictures I would like to share but can't get it to work now for some reason. Not doing anything different than I have before.
Grrr. It is very aggravating!
I just can't figure this one out! I have a bunch of pictures I would like to share but can't get it to work now for some reason. Not doing anything different than I have before.
Grrr. It is very aggravating!
less is good
The hubby and I have been on this diet. It is working. Mostly we are just eating less. There is a program supported by my Dr.'s office that does actually work. I am getting off it simply because the cost is more than we can afford. I just don't understand why so many complain about the state our country is in regarding obesity and yet, all the healthy foods cost so much more. When the economy is bad like it has been for a few years now people generally just cannot afford the foods that are good for you.
I had to get really creative with our meals because of what is allowed and what isn't. I believe that I can continue this new cooking method after going off the diet. Please encourage me all you can.
Pictured here is a chicken dish I recently made. It is what I will call my chicken wraps.
chicken strips (2 per person or if not dieting as many per person as you like)
1 slice of turkey bacon per chicken strip
2 tbsp olive oil
Seasonings: poultry seasoning, garlic powder, onion powder, sweet paprika, basil, sea salt <fine>, black pepper. Mix it all together. The amount of each depends on how many chicken strips you have.
Preheat oven to 350.
Lay the chicken strips out and drizzle very lightly with olive oil. Use your hands to be sure they are all well coated. Sprinkle the seasoning mixture over top and be sure to cover all sides well. Wrap each strip with one piece of turkey bacon. Spray a baking pan or use a very light coating of olive oil. Place the chicken on the pan and place into preheated oven. Bake approximately 30 minutes or until it looks done. Checking chicken strips is easy, cut a small section in the middle and look for any pink. If it is, cook longer; if it isn't, it's done. Serve with vegetables of your choice. It is delish!
Saturday, June 25, 2011
making up for lost time
Ok, so I have been a bit lax on posting on here. Sorry, Mary! I am going to try to make up for it by posting a few different recipes at once. Please bare with me. I will begin typing up my recipes and get them posted on here in the next couple of days. For now, I will post a couple of pictures for you to drool over. hee hee


Tuesday, May 24, 2011
Omelettes

For a long time, I didn't like omelettes. I think it was because I never had a good one. They were always too thick, so either the outside was WAY overdone, or the middle was runny (raw). Yuck.
Then I started watching cooking shows, and their omelettes didn't look anything like any of the omelettes that I had tried (I never tried to make one myself; I am talking about restaurant omelettes---okay, yes, diner/dive restaurants, but still).
Anyhoo, when I saw the ones they made on these shows, I thought they actually looked appetizing. The only hitch was that they always mentioned how difficult it is to make a good omelette.
Well, I bought right into that. I figured that making an omelette was something only chefs could do.
(rolling my eyes), Wrong.
Now that I have experimented with them, I think they are easy. There are two main rules. The first is, don't make it with too many eggs, or in too small a pan. The pan should be non-stick, big enough to handle the amount of eggs you want (The egg mixture should not be more than 3/8ths of an inch deep) and the sides should be a gradual slope, not too steep.
The second is, the pan must not be too hot. On my stovetop, I start on the setting "6"or just past medium, preheat the pan just so the butter melts and starts to bubble gently, add the egg mixture, turn the heat down to "4" or medium-low, and as the eggs coddle a little, stir them gently all around but not so much as to mound them up, then add any other ingredients you want in a line in the middle of the omelette (the way you would for a burrito), let it cook until the egg is almost set, but still moist on top, then with a spatula lift and roll one edge over the ingredients, and roll and slide the whole thing off the pan and onto a plate.
The omelette above is made with Fresh Free Range Chicken Eggs that I get from one of my dressage students, New York Extra Sharp Cheddar Cheese, Seared Sirloin and Crimini Mushroom Pieces, and Chopped Fresh Basil. I served this with Sourdough Toast for dinner tonight.
I like omelettes for dinner, because it just seems like kind of a heavy meal for breakfast.
Momma T., do you like omelettes?
Sunday, May 22, 2011
My Summer Garden is Growing
Do you remember those cute little seedlings that I had grown from saved seeds in a flat that I took a picture of a couple months ago? Well, they are growing up very well, and are promising to produce some fruit and such.
Here are some pictures:

 On the left is the Heirloom Red Beefsteak Tomato. When it first started flowering, the flowers would just fall off and not develop into the tomatoes, so I just left it alone and it corrected itself. I think it was just too humid in those first two weeks of flowering (we had an early heat/humidity wave here in Florida). Then we had a cool front push through, and the humidity level dropped and voila! 8 tomatoes. I am happy. They are about half grown now, and will be very large tomatoes. There are also more blossoms, and the plant is indeterminate, so maybe we will have even more on this plant. On the right is one of the German Pink Heirloom Tomato, and I had a blossom-end rot issue with them early on, which is caused by a calcium deficiency (I found that out by online research--thanks Bonnie's website!). I didn't have the product that thei recommended, but I do have human calcium supplement pills, so I crushed them up, dissolved them in water, and used them as a drench. It seems to have worked (and Bonnie's site was a bit pessimistic about anything helping once the plants set fruit). I have 6 tomatoes on that bush so far. We will see if any survive.
 I don't know if you can see the little sweet peppers on the bush----> but there are many flowers, and 6 have already begun to form into the bell peppers; the biggest is the one close to the top of the picture, and one just right of center.
 And here is one of the three personal mini-watermelons that have set so far on the watermelon vines. I have a couple more that are just starting to develop, but certainly aren't noteworthy yet. :-)
 The basil is growing at a really fast pace. I have been cutting it almost everyday, and using basil in almost everything I cook. All my herbs are producing so well that I am providing fresh herbs to one of my clients, who gives me her free-range chicken and duck eggs in return! I love bartering with food! LOL
Friday, April 22, 2011
Quick and Easy Sausage Pasta Skillet

This is my go-to meal for a quick and easy dinner, with enough left over for hubby's lunch the next day. You can change out any or all of the ingredients so that it seems like a new meal, but the prep is easy as pie, no matter what the ingredient list.
Ingredients:
1 pound of pasta (bowties--my favorite, penne, or other pasta shapes that you like)
1 pound of your favorite bulk sausage (I like Italian Pork Sausage) or any other meat, chopped into bite size pieces
Fresh Vegetables like zucchini, baby carrots, tomatoes, broccoli, mushrooms, green beans, kale, spinach, or whatever veggie you like, chopped into bite size pieces the sae size as the meat.
Extra Virgin Olive Oil
Pitted Black Olives sliced or chopped(Optional)
Crumbled Goat Cheese
Prepare the pasta al dente and set aside to add last to the skillet.
In a large skillet, brown the sausage, remove the sausage to a bowl, and pour off almost all the grease from the skillet--reserving about 1 tbsp in the pan. Add a tbsp or two of EVOO, heat on medium high and add the chopped fresh veggies that take longer to cook (carrots, broccoli, green beans, kale, etc.) cook for a minute or two, and then add the softer veggies (zucchini, tomatoes, mushrooms, spinach, etc.). Sear the veggies until tender but still crispy, add the sausage back in and the black olives and add the pasta at the end. Stir and cook for a minute for the flavor to develop, but don't let the veggies over cook. At the very end, add the goat cheese, stir once, and serve. Dinner is done.

Sunday, April 17, 2011
Ultimate Stuffed French Toast
I love breakfast, but I rarely have time to eat it at the beginning of the day. Most of the time, my idea of breakfast runs along the savory line--eggs any way you can fix them, bacon, grits, hashbrowns, toast, etc. On more rare occasions, I have an urge for the sweeter side of breakfastdom with pancakes, french toast, fruity baked goods, fruit itself, etc.
I have probably made french toast once in the last 20 years, but today I woke up and got inspired to make it, and then I thought, "why stop at plain old french toast? Why not enhance it?" So I started thinking about what would make it special, and here is what I came up with:
My Ultimate Stuffed French Toast

Mascarpone, Strawberry/Lime Stuffed French Toast with Pecan Syrup
Ingredients:
2 slices Egg Bread, sliced 2” thick
¼ cup mascarpone cheese
¼ cup ricotta cheese
¼ cup honey
¼ cup fresh strawberries, chopped
½ fresh lime with zest
1 large egg
½ cup of whole milk or ¼ cup skim milk and ¼ cup heavy cream
2 pinches of Freshly grated nutmeg
Butter for cooking
Pecan Syrup (or other syrup, but pecan has a hint of nuttiness that goes well with the fruit aspects)
Confectioner's sugar for sprinkling on top
Additional slices of lime and sliced whole strawberries for garnish
Preparation:
Mix together in a small bowl the mascarpone, ricotta, honey, fresh chopped strawberries, juice and zest of ½ lime, and a pinch of nutmeg
In a separate shallow dish, beat 1 egg, the milk/cream and a pinch or two of nutmeg until blended
Melt butter in a sauté pan on the stovetop on medium heat
Slice a pocket into the bread slices (from the side) and stuff the mascarpone mixture into the pocket and press shut (approx. 1/2 the mixture into each slice)
Dip one slice into the egg mixture on all sides to coat well, and transfer to the heated sauté pan. If there is room, you can add the other, but make sure there is plenty of room to flip each.
Cook until the side is mottled golden brown, then flip and cook the other side the same
Transfer to plate, add a small amount of syrup, sprinkle a bit of confectioner's sugar, garnish with strawberry and lime slices if desired, and serve.
Friday, April 15, 2011
My Florida Summer Garden
The other thing I am proud of, and a little nervous about, as well, is that I am trying to make this an organic garden, drawing on the horse manure compost pile that is a result of my business, teaching and training Dressage.
I have transplanted them out into bigger pots now, so the second step is success, as well. I will take pictures of milestones as we go along, and below are the first two milestones that I captured:
In the first picture are my herbs-- Rosemary, Chives, Marjoram, Greek Oregano, Lemon Balm, and Sage.
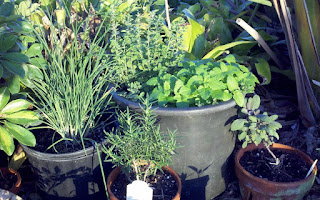
These are the herbs that I first planted last spring, that have survived past winter, and have started to grow again. The Basil, which is an annual, died back of course, but I saved some of the seeds, and it is part of the seed flat, below......
 Here is the flat of vegetables that I planted. The Mini-Watermelons, Cantaloupes, Bell Peppers, Heirloom Red Beefsteak Tomatoes, Heirloom German Pink Tomatoes, and Basil sprouted quickly and easily, and are growing like gangbusters even after transplanting into their permanent plots. I planted the watermelon and cantaloupes in the ground, and everything else in 7 gallon pots filled with organic compost.
The only thing that didn't sprout was the Eggplant, which makes me a bit sad, since Eggplant grows so well in my area and I love eggplant, but I can certainly trade for Eggplants with my Heirloom Tomatoes, Bell Peppers, Basil, and other herbs and vegetables. What are you growing this season?
Thursday, March 10, 2011
Jambalaya
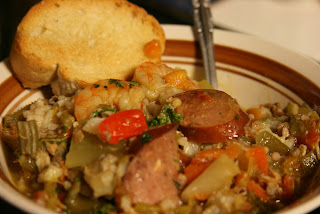
I made this for Fat Tuesday (Mardis Gras). This is a dish that would be good any time. Fairly simple to make and really tasty. The most work is the chopping and prepping. The picture I have here of it does not do it justice as I forgot to take a picture until the next day when everything was combined. Please give this one a try and let us know how it turns out.

JAMBALAYA
1 MEDIUM WHITE ONION - DICED
½ LARGE RED ONION – DICED
4 STALKS CELERY – DICED
CARROTS – DICED SMALL (ABOUT ½ CUP)
½ EACH OF RED, GREEN, YELLOW BELL PEPPER – DICED
4 CLOVES GARLIC - DICED
1 SMOKED SAUSAGE (LIKE ANDOUILLE OR KIELBASA) CUT INTO ½ INCH BITES
1 PALM SIZE PORTION OF BREAKFAST SAUSAGE (NOT LINKS)
LEFTOVER CHICKEN – TORN INTO PIECES
1 LB. OF SHRIMP, DEVEINED (PRE-COOKED IS OK)
1 CAN OF DICED TOMATOES
1 ½ CUPS OF SLICED OKRA
OLIVE OIL
1 TBSP. FLOUR
2 TBSP. CREOLE SEASONING
CHICKEN STOCK
POUR OLIVE OIL IN BOTTOM OF PAN (ABOUT 1 – 2 TURNS OF THE PAN). HEAT TO MEDIUM HIGH AND ADD IN ONIONS, PEPPERS, CELERY, CARROTS, AND BEGIN TO SAUTE. WHILE THE VEGGIES ARE HEATING, PUT YOUR SAUSAGE IN A SKILLET AND COOK UNTIL DONE. WHEN THE SAUSAGE IS ABOUT HALF COOKED YOU CAN ADD IN YOUR GARLIC TO THE OTHER VEGGIES. AT THIS POINT YOU CAN ADD IN YOUR OKRA AND CANNED TOMATOES. REMOVE THE SAUSAGE AND ADD TO THE VEGGIES BEING CAREFUL TO LEAVE THE OIL IN THE PAN. ADD THE FLOUR TO THE OIL AND WHEN IT THICKENS ADD IN CHICKEN STOCK OR YOU MAY USE WATER AND A CHICKEN BASE. YOU DON’T NEED MUCH, JUST ENOUGH TO THICKEN UP YOUR POT. POUR INTO POT WITH VEGGIES AND SAUSAGE. ADD THE LEFTOVER CHICKEN AND CREOLE SEASONING. ADD MORE CHICKEN STOCK IF NEEDED JUST ENOUGH TO COVER THE TOP OF THE MEATS AND VEGGIES. IT SHOULD HAVE THE CONSISTENCY THAT IS MORE LIKE A STEW. A LITTLE ON THE THICK SIDE. LET SIMMER FOR ABOUT 15 – 20 MINUTES. IN THE LAST COUPLE MINUTES OF COOK TIME IS WHEN YOU ADD IN YOUR SHRIMP. (I LIKE TO USE THE PRE COOKED SHRIMP AND PEEL A FEW OF THE SHELLS OFF AND DROP IN THE POT FOR FLAVOR. JUST BE SURE TO REMEMBER HOW MANY YOU PUT IN AND PULL THEM OUT BEFORE SERVING)
MAKE A SIDE OF WHITE RICE AND SCOOP A MOUND ON TOP WHEN SERVING (use an ice cream scoop). THEN GARNISH WITH SLICED SCALLIONS OR SOME CHOPPED FRESH PARSLEY.
Wednesday, March 9, 2011
Beef Kidneys and Kale in Wine/Cream Sauce

So the other day, when I got back into town after teaching a riding clinic and judging a schooling show, I went grocery shopping, and found some beautiful beef kidneys. So I bought them.
Now, I have never prepared kidneys before, but being the adventurous eater that I am (and knowing that hubby and I like both beef heart and liver), I decided they were too beautiful to pass up. After all, they are organs (offal), just like the others.
They do have a slightly stronger odor than the other organs, and so I decided to look up preparation ideas online. Even though it is very cheap ($1.19 per pound in Publix), I didn't want to prepare it incorrectly and waste a perfectly edible source of protein, and I am glad that I listened to my gut (no pun intended). There is a secret, I found out! Here is a link to a Mother Earth News article on Beef Kidneys--How to Eat for Less: the Secret to Organ Cookery. It is a fine article.
Prepare the kidneys according to the article, and then try this recipe:
*1 pound of egg noodles (or other noodle or pasta of choice)
*1 pound beef kidney--cut away the core and membrane and slice thinly (the kidney I bought was 1.6 pounds, but by the time you cut away the core/membrane, I think you will have about 1 pound)
*3 large leaves of Kale, cut chiffonade style (thin strips)
*2 cups mushrooms, sliced (White or Crimini)
*1 medium onion, thinly sliced
*2 cloves garlic, minced
*sea salt and cracked black pepper, to taste
*Extra Virgin Olive Oil
*1/2 cup sour cream
*1/2 cup dry red wine
*1 tablespoon brown mustard
*small bunch of fresh thyme, marjoram and basil, finely chopped
*1 teaspoon of corn starch for thickening
Prepare noodles or pasta according to package directions.
Heat a large saute pan over medium high heat. Add EVOO, heat until oil shimmers, and then add mushrooms. Saute until golden brown. Add kidneys, and brown 2-3 minutes. Add Kale and saute another 2-3 minutes. Add the Wine and Mustard and let cook down for a few minutes. Add the cornstarch to thicken if needed. Add the herbs at the last minute, turn the heat down to medium-low, and stir in the sour cream. Salt and pepper to taste. Let cook for 2-3 minutes to let the ingredients meld together, stirring often.
Plate over the noodles, serve with some crusty bread if desired and pair with the red wine you cooked with. I paired this with the Spanish "Lar de Lares 2002 Tempranillo". I hope you like this as much as my hubby and I did (he no longer thinks I am out to starve him, or poison him. LOL)
Monday, February 7, 2011
your Tuna dish
WOW! That looks and sounds like a really delicious meal. Thank you for that one, Mary. I love the blend of the colors in the picture. I have done chicken, beef, and pork with terriyaki, but have not tried it with seafood. I enjoy the flavor of the terriyaki so I will have to give this one a shot.
Have you tried any variations on the meat? Like = other seafood or even some other meat all together?
What about different veggies?
I have learned that so many dishes that you might find you like at restaurants can be duplicated and altered to individual tastes and moods so easily. You can prepare the same meal and just change one or two things to give it a whole new flavor. Food is really versatile.
I have to apologize for not posting anything for a while. I have been a bit overtaken with my daughter's pregnancy, having the baby, and then me going to visit. I am back home now and other than my normal routine, doing more with church, and possibly helping my mother in law I will only be searching for a job and should (hopefully) be more available to post more dishes and comments here.
until then....
Happy cooking and good eating!
Teresa <aka> Momma T
Saturday, February 5, 2011
Teriyaki Glazed Tuna Steak

5 oz. sashimi grade tuna steak per person
8oz. fresh spinach leaves per person
1 cup of cooked saffroned short grain rice
Teryaki Sauce
Extra Virgin Olive Oil
Coarse Himalayan Pink Salt (or Grey Sea Salt)
Coarse Cracked Black Pepper
This dish is SO simple to make that I only will give you the ingredients--I think you can all glean an idea of preparation, but there are some key techniques to having it turn out perfectly.
First is, fresh tuna and a HOT pan, and not too much oil. Put the Olive Oil in first, then sear the Tuna, then add the Teriyaki to the pan to finish the sear.
Next is, please don't overcook the tuna--rare is the word, here. Overcooking it is sacreligious (sp?).
Make sure you put enough spinach in the saute pan to actually give your diners a serving--it cooks down a LOT.
Don't go light on the saffron in the rice. It takes a pretty good pinch to make it such a warm yellow, and for those of you that are not familiar with it, put the Saffron in the rice water as soon as you put it on the stove and it will steep as the water comes to a boil. It gives the rice a subtle, unique flavor that plays on the tastes/textures of the spinach and Tuna.
Give this a try, using your own instincts, and let me know how it turns out.
Tuesday, January 18, 2011
Not the Gub'mint's Mac-N-Cheese

Growing up, I never knew we were poor. The reason that I never knew we were poor is that my mother made macaroni and cheese for us about once a week. To me, it was the most decadent stuff on the planet, and I knew that we had to be rich to be able to afford such a rich, scrumptious dish. HAH! It wasn't until I was sitting around with the family, telling stories of our youth (in my thirties, no less), that I piped up and said how much I loved it, and my brother and sisters agreed and that we were so lucky to be able to have macaroni and cheese so much growing up....well, my mom started chuckling in the way only a mom who has a long-kept secret over her children can chuckle......and when we questioned her, she 'fessed up.
Seems that the US Government had a program for (poor) military families in which they GAVE AWAY cheese and milk. She told us we were so poor that we had to depend on these offerings because the monthly salary that my dad made didn't last until the end of the pay period, so we couldn't afford meat from time to time. LOL
I never knew......
Anyway, the news didn't dampen my affinity for the Mac-n-Cheese. No, not boxed mac-n-cheese that you buy in the store. We couldn't afford that (thankfully). My mom made it from scratch, and that is what I do. However, I will say that I have strayed from the original recipe and this is not my mother's Mac-N-Cheese.
Take heart in the knowledge that you will not feel deprived with this version. Sigh, the Gub'mint's subsidy cheese is not represented here.
Ingredients:
2 tablespoons Butter
1 healthy tablespoon all-purpose flour
1 cup milk
1/2 cup heavy cream
4 ounces Gruyere Cheese, cubed
4 ounces mild Cheddar, cubed
4 ounces Muenster Cheese, cubed
4 ounces Gouda Cheese, cubed
3/4 lb. elbow macaroni (I like Muellers)
2 qts. water
1 generous tablespoon kosher salt
1/2 teaspoon fresh ground nutmeg
3/4 cup Panko Breadcrumbs
1 tablespoon Butter
Bring water to a boil in a 4 Quart saucepan. Add salt and macaroni and cook according to directions on the box. When finished cooking, drain immediately in a strainer or collander. I cook it al dente and don't rinse my pasta.
In a separate 3 or 4 Quart saucepan, melt 2 tablespoons butter, add the flour to the melted butter, stir until velvety and cook on low heat until the mixture becomes blonde. Add milk and cream, and cook on medium heat, stirring almost constantly, until the sauce thickens. Add the cheeses, a bit at a time and let it melt, stirring constantly to prevent scorching. When the cheese is melted, add the nutmeg, stir to incorporate, and then add the macaroni. Stir to coat and combine all ingredients fully.
Transfer mixture to a baking dish or baking tin, about 9"x12" inches.
Melt 1 tablespoon of butter in a small dish. Add panko breadcrumbs and toss to coat evenly. Sprinkle over the top of the macaroni and cheese mixture. Bake in a preheated 400*F oven until the breadcrumbs are golden brown and the cheese is lightly bubbling on the sides of the dish--about 15-20 minutes. You can use this as a side dish for almost any protein or as a stand-alone casserole, like I do.
Tuesday, January 11, 2011
Garden
Mary,
Yes, society needs to stop putting up with what the government "dictates" we have available to eat. I really enjoy having a garden. The worst part is that the location is in a back field and I have to drive and go past my mother in laws house to get to it. She can be a bit nosy at times. lol AND she lets me know that how I do my gardening is not the way they always did it when she was growing up or even when she put a garden out. I love her, but I like doing my garden my way not hers. She does have good tips and ideas on canning produce which I readily listen to and use.
We have decided that with our garden this year, we will plant extra and donate that to our church. The church has a food pantry and I know first hand that the food received from a pantry is not the healthiest. It is great to have food to prepare and even better to receive food for free. We want to be able to give something to the community that they don't normally get.
I have thought about setting up a stand on the side of the road, but there are so many people who do that. The competition just wouldn't make it worth it. Plus, living as far out as we do it would mean driving a good distance and not only packing up the produce, but plan for enough water, food, etc. to last sitting out in the sun somewhere all day. I just don't have the patience to sit all day like that, especially alone and I know I would be alone.
I like the idea of putting our comments in separate posts instead of commenting on a post. Eventually I am sure that we will have followers. Somebody will catch a glimpse of our blog and tell someone else, and so on and so on. Until then.... I think what we are doing is just fine. We are able to share recipes, thoughts, ideas, and some pretty good tips.
I love the bread recipes! My associate pastor has been posting food that she has been cooking with all the snow days we've had and she is just killing me with all the bread, buns, cookies, and main dishes she prepares. She is Italian and she loves to cook and makes lots of it. I start drooling when I read what she is making. Keep the bread recipes coming. I have never been real big on making bread, but lately have thought about attempting some. I think I have some chicken feathers to pluck off myself first. ha ha
Ready for Spring and plowing and planting!
Chicken N Dumplins
1 - 2 lbs. Chicken - whatever you prefer to use (dark meat gives the dish extra flavor)
1 onion, diced
3 garlic cloves, diced
carrots, diced (use whatever amount you prefer, I like carrots so I use a lot)
 salt & pepper to taste
1 1/2 tsp. basil
2 tsp. poultry seasoning
1 tsp. rosemary
flour, shortening, water, milk - for dumplings
Put the chicken and veggies in a pot of water and boil until chicken is thoroughly cooked. Remove the chicken and let it cool. Once the chicken is cooled enough to handle, pull it, chop it, tear it into small bite-size pieces.
Mix your dumpling mixture just like you would for making biscuits (I always get my husband to do this because he is the bread maker in our family).
While the liquid is boiling (before adding in the chicken) add in your seasonings then drop in spoonfuls of the flour mixture one at a time. Take time not to crowd your dumplings or drop them on top of each other. Once all your dumplings are in and have had about 3 - 4 minutes to boil add in your chicken pieces.
The hardest part of this dish is waiting for the chicken to cool.
Happy cooking and good eating!
Saturday, January 8, 2011
My Favorite Bread Recipes
Speaking of bread, Momma T (for those readers who are new to the blog, yes, Momma T. did mention bread in her comment on the post, "Not Quite a Recipe...."), for many years I was afraid of making bread from scratch. When we lived overseas, one of our closest neighbors used to bake bread rolls, called "pan" (pronounced, pahn) for the market, and though I never helped her bake, her house always smelled SO good. And we always had fresh-baked bread. She was always in the kitchen, so I thought that baking bread was a really difficult process. And when we came back to the States, my recollections of anyone who baked bread was stories of how they "slaved away in the kitchen all day over the loaves, but all the effort was worth it for their families". They lied. It is not so difficult! In fact, I wanted to bake my own bread so badly, but I was so traumatized by the stories that I had to ease into the breadmaking adventure by asking for an automatic breadmaker for Christmas to make that intermediary step! LOL
Basic bread recipes are so easy, and so cheap, that you will wonder why you ever bought a loaf of bread.
Flour, Water, Yeast, Salt. Mix, Knead, Rest, Shape, Bake.
You have Bread.
What could be easier??
BASIC BREAD RECIPE
3 cups of bread flour
1 teaspoon kosher salt
1pkg. (2 tsp.) activated dry yeast
1-1/8 cup lukewarm water (about 110-120*F)
Mix the ingredients together in a large bowl (I prefer glass bowls)
If it is too wet and won't come away from the sides, add a little more flour (about 2 tbsp. at a time). If it is too dry to form a ball, add about a tablespoon of water.
Take the dough out of the bowl, and put on a flat counter surface that has been liberally dusted with flour. Knead (give it a deep-tissue massage) for about ten minutes. the dough will become elastic and feel like Silly Putty (you remember that stuff from childhood, right?) Return it to the bowl, and let it rise until it is twice as big as it was when you finished kneading it. It should take about an hour and a half.
Punch it a few times to deflate it, then re-cover it and let it rise for about another hour.
Preheat the oven to 375*F.
Take the dough out of the bowl, put it on a large cookie sheet and shape it into 2 equal sized loaves. You can make it any shape you want--round, long and skinny, oval, etc. Make a couple of shallow scores (slice it in a couple places on the top, about 1 inch deep).
Place the loaves on the cookie sheet in the center of the preheated oven, and let cook for approximately 45 minutes. The time will vary a little depending on what shape you have it in, but the crust should be brown and when you gently thump the loaf, it should sound a bit hollow. Let cool completely, slice and enjoy!
Those are the basics.......
Now, there are certainly ways to make the bread taste better, and be healthier for you. Experiment. Be Free! What is the worst that could happen? It doesn't rise? It doesn't taste good? Oh well, try again. The most costly thing you will have wasted is time.
When I was first learning to make bread without my breadmaker, there were slight missteps, but I never made a loaf that was inedible, and experimenting helped me to develop the recipe that I will share with you now. It has some "expensive" ingredients in it, but it only costs me about $1.37 per loaf to make! That is about half of what an over-processed, preservative-ridden, who-knows-when-it-was-baked loaf of bread will cost you at the store. And it freezes very well, which is good, since you should probably slice and freeze it if you aren't going to use the whole loaf within 48 hours, because it WILL go stale and/or mold. :-)
MARY'S MULTIGRAIN BREAD
2 cups bread flour+1 cup for adding to dough while kneading
1 cup whole wheat flour
1/3 cup coarse corn meal
1/3 cup bulgar wheat
1/3 cup flax seed (whole), and I like the dark seeds for contrast in the crumb
1/3 cup pearled barley
1 pkg. active dry yeast
1 tsp. salt
3 Tbsp. honey
1 egg yolk
1 Tbsp. salted butter
2 tsp. gluten
1 egg white, plus enough water to make an eggwash
Rolled Oats to sprinkle on top of two loaves
Approx ½ cup of water (to pour into a skillet in oven for steam)
Mix corn meal, bulgar wheat, flax seed, and barley in a 2-quart pot, and add enough water to cover +2 inches. Bring to boil on stovetop, turn down heat to simmer for about 20 minutes. Do not leave unattended, stir often. It should be like soupy cream of wheat (or grits, for us southerners, LOL). If it gets too stiff, add more water (these ingredients will soak up water, and that is the idea.)
Remove from heat, and allow to cool.
Put enough oil or butter to coat a large stainless steel or glass bowl, combine the flour, cooled grain mixture, salt, honey, egg yolk, butter, gluten and yeast, and mix well.
If the mixture is too dry, use the ¼ to ½ cup of water to get it to the right consistency for turning out of the bowl and kneading, if it is too soupy, add some bread flour—these measurements vary quite a bit from loaf to loaf; I was surprised.
Turn dough out of bowl onto a well-floured surface. This dough is typically very sticky at this stage, so don’t worry about over-flouring the surface….add as much as you need to as you knead.
Knead until the dough becomes elastic and you can shape it into a ball, usually about 5-6 minutes. Be careful not to over-knead it.
Shape into a ball, cover and let rise until it doubles. Be patient (I’m not).
Punch down, separate dough in half, shape into loaves (no loaf pans needed as long as you have a stone, or a cookie sheet), score the loaves diagonally with a sharp serrated knife
After shaping, let the loaves rise for approx. 40 more minutes
While the loaves are rising, put a clean, dry cast iron skillet on the bottom shelf of your oven.
Prepare an egg wash with the egg white and water. Just before you are ready to put the loaves in the oven, brush them with the egg wash and sprinkle the top of the loaf with rolled oats—Quaker Quick Oats is what I use.
Turn on oven and preheat to 450*
Slide loaves into the oven, and pour 1/2 cup water into the cast iron skillet and immediately close the oven door to trap the steam. Bake loaves for approx. 30 minutes
Remove loaves from oven, let cool for at least 30 minutes. Slice and Enjoy!
Subscribe to:
Posts (Atom)